


What “No Reservation” Really Means in Banff

Trail access is usually walk-up, but parking can be stricter
On most Banff hikes, you can reach the trailhead and start without a reservation. The friction usually comes from:
- National park passes (you’ll typically need one, regardless of the hike)
- Parking demand in Banff town and popular valleys
- Peak-season shuttle or access rules that can affect how you get to specific trailheads
Before you drive in, double-check the current local guidance for the area you’re targeting.
Pick trailheads with the least “logistics risk”
For a smoother day, choose routes that start from places where you can realistically park and walk to the trail:
- Banff town and immediate surrounds (more frequent parking turnover)
- Well-marked trailheads near major roads
- Trails that are popular but not dependent on a single “signature” parking lot
Timing strategy: arrive early, then hike in the right light
A reservation-free day is mostly a timing game. In summer and shoulder seasons, aim for:
- Morning start to beat full lots and to travel in calmer weather
- Midday flexibility (if parking is full, switch to a shorter option close to your current location)
Expect cooler temperatures at higher elevations, and bring layers even in July.
Easy Hikes With Straightforward Navigation
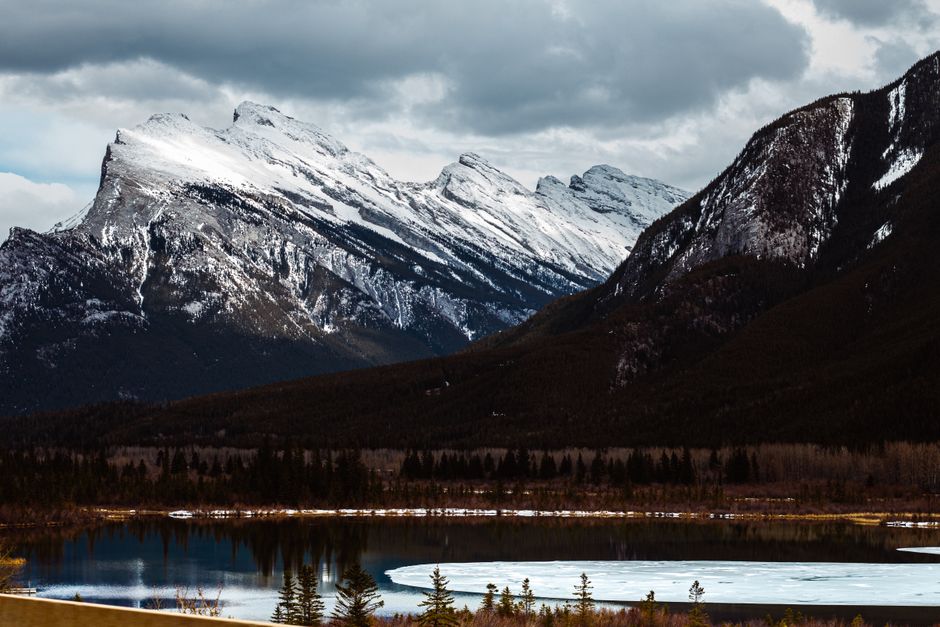
Vermilion Lakes Loop (Banff town edge)
Why it’s good: Flat to gently rolling, easy navigation, and strong scenery with minimal elevation stress.
Trailhead & parking realism: Start near the lakes access points on the Banff town side. Parking is usually most manageable early; later in the day it can fill quickly during peak months.
Timing: Plan on 1–2 hours for a relaxed loop. Late afternoon gives you better reflections, but the trade-off is busier parking.
Navigation basics:
- Follow the shoreline paths/boardwalk segments and look for signed junctions.
- If weather turns, stay on the maintained route rather than “shortcuts” across wet grass.
Bow River to Policeman’s Lookout (Banff)
Why it’s good: A classic river walk that builds quickly into viewpoints, with easy-to-follow signage.
Trailhead & parking realism: You’ll typically park in or near Banff town access points for river trails. This area is popular—arrive early if you want a straightforward parking experience.
Timing: 1–3 hours depending on how far weaves you choose and how long you linger at overlooks.
Navigation basics:
- Stay on the main maintained path system; junctions tend to be clearly marked.
- Fog and low cloud can make distances feel short—watch for slippery river-adjacent sections.
Tunnel Mountain & Cave and Basin area (historical overlook trails)
Why it’s good: You get elevation without committing to a full day of climbing, and the trail system is generally intuitive.
Trailhead & parking realism: Choose the Cave and Basin / Tunnel Mountain area trailheads from the town side. Like other town-adjacent trail access, the lot situation changes fast—morning beats afternoon.
Timing: 1.5–3 hours for a half-day loop or point-to-point option.
Navigation basics:
- Expect multiple short spurs: take the signed routes that match the view you want.
- If you’re using offline maps, make sure your GPS is “locked” before starting the ascent—Banff valleys can bounce signal quality.
Moderate Day Hikes for Big Views
These hikes usually don’t require reservations to start, but they do demand better timing and clean navigation discipline.
Grassi Lakes (from the Cascade Ponds area)
Why it’s good: A relatively short climb that delivers rewarding lake views, with clear route character.
Trailhead & parking realism: Trail access is commonly from the Cascade Ponds / Grassi Lakes parking area. In busy seasons, parking can fill—if you arrive late, be prepared to park farther away and add time.
Timing: Plan 2–4 hours total, including photo stops.
Navigation basics:
- The route is well-travelled, but you still want to track the main route vs. side turns.
- Watch your footing on wet rock; shoulder-season snowmelt can leave slick patches.
Plain of Six Glaciers (Lake Louise corridor)
Why it’s good: Glacial landscapes without a technical climb. It’s a strong “you’ll know you’re in Banff” day.
Trailhead & parking realism: This hike is typically reached from the Lake Louise area. Parking can be the sticking point in peak months—your best bet is an early arrival and a plan B if lots are full.
Timing: Often 3–5 hours depending on how far you push beyond the main viewpoints.
Navigation basics:
- Expect distinct trail segments as you approach the glacial views—stay on the marked path and don’t cut across switchbacks.
- If you’re hiking in winter or early spring, assume icy or slushy stretches and use careful pacing.
Lake Agnes Tea House (from the Banff side trail network)
Why it’s good: A classic glacier-and-lake setting with a clear destination (and a mid-hike “goal” to keep momentum).
Trailhead & parking realism: You’ll start from the Lake Louise / Banff-side access network depending on the chosen approach. Like other high-demand areas, parking fills quickly—start early.
Timing: Typically 3–5 hours round trip. Add time for breaks at lookouts.
Navigation basics:
- Follow trail signage closely at junctions; this route is popular, but a wrong turn can add distance.
- In changing weather, visibility drops fast in mountain terrain—keep an eye on the trail and avoid relying on distant landmarks alone.
Navigation and Timing Basics That Keep You on Route
Even with well-known hikes, your margin for error matters—especially when trails are busy or conditions change.
Build a simple “stay-found” plan
Before you set off, you’ll do best with a three-step process:
- Identify the exact trailhead from your offline map (not just the general area)
- Save your route before signal drops
- Note 2–3 key decision points (major junctions and turnaround/view areas)
If anything looks off—widening paths, missing signs, or a sudden change in terrain—pause and re-check your orientation.
Choose the right time of day for trail conditions
In Banff, light and temperature swing quickly. For reservation-free hiking:
- Early morning: drier trails in summer, firmer footing in shoulder seasons
- Midday: more crowded; accept that rest stops are slower
- Afternoon storms (summer): keep an exit plan—don’t push deeper into terrain if clouds build
Know what to expect on common Banff trails
Even on “moderate” routes, the Banff environment can change how hard a hike feels.
- Rock and roots can be slick after meltwater or rain
- Wind exposure increases quickly near viewpoints
- Snow and ice can linger in shaded sections well into spring
Bring layers, and treat weather as part of the route—not an afterthought.
What to Do Next
Pick one town-adjacent hike for your first outing (to confirm your timing and navigation rhythm), then schedule a moderate option the next morning if conditions are clear. If parking looks uncertain, plan a switch to a nearby trailhead rather than driving in circles—Banff days get smoother when you keep your backups close.