

Planning a self-guided hut-to-hut hike in the Dolomites is a balancing act: you want scenic stages, but you also need beds at the right rifugi and realistic days if storms roll in. The trick is to treat your route as a set of “stages with backups”, not one fixed line on a map.
Below is a practical way to pick your trail variants by difficulty, lock in hut reservations at the right time, and build rain-and-turnaround options that still let you finish your loop comfortably.
Start With a Hut Corridor, Not One Famous Summit
A hut-to-hut itinerary works best when your stages connect logically—same direction, reasonable altitude changes, and enough options that a reroute still lands you somewhere with a bed.
Choose a corridor with multiple “step-in” rifugi
Instead of starting from a peak, start from a corridor where you can realistically shorten or extend a day. In the Dolomites, that usually means choosing an area with several rifugi close enough to stitch into 3–7 day stages.
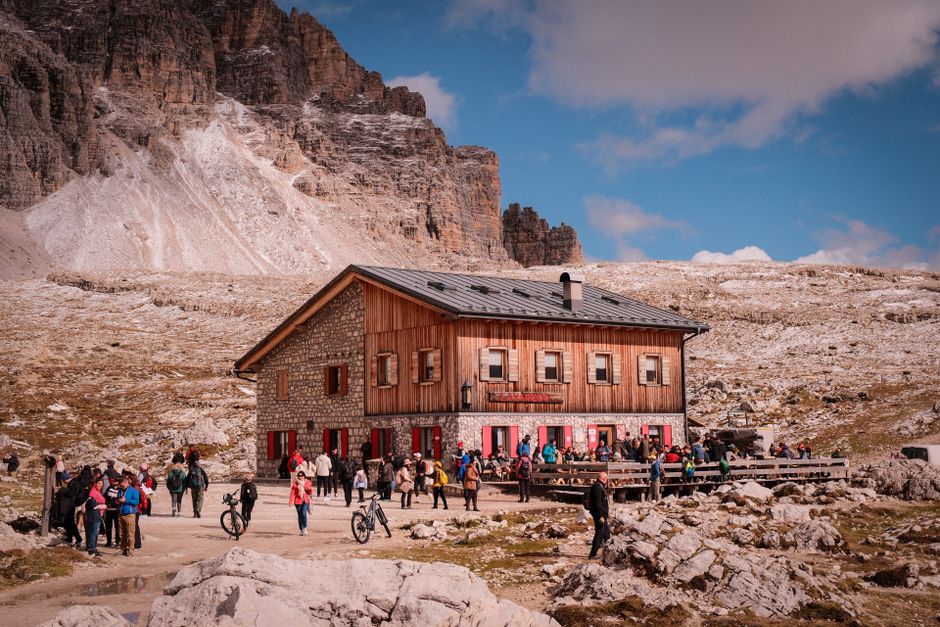
To help you picture what “corridor planning” looks like, here are common hut nodes you’ll see referenced in self-guided route planning:
- Rifugio Auronzo (Tre Cime area)
- Rifugio Lavaredo (Tre Cime area)
- Rifugio Locatelli (Tre Cime area)
- Rifugio Contrin (Marmolada area)
- Rifugio Serauta (Marmolada area)
- Rifugio Coldai (Civetta area)
You don’t have to use these exactly, but they show the pattern: several rifugi in the same general region, so you can adjust stages without rewriting the whole trip.
Decide your stage count by how you hike, not by the calendar
Most self-guided hut walks work well as:
- 3–4 days for a “classic taste” with shorter distances
- 5–7 days for more variety in landscapes and less pressure per stage
If you’re the kind of hiker who can only maintain pace for a few hours, keep each stage focused: one long-ish ascent, one steady traverse, and a clear arrival window at the rifugio.
Build your route on time windows, not mileage alone
Dolomite stages can feel longer than their distance because of altitude gain, rocky footpaths, and changes in footing. Use time estimates from your map app, then add a cushion for slow sections (scree, narrow trails, via ferrata approaches, or wet descents).
As a planning baseline, aim to arrive with daylight and energy—especially in summer when thunderstorms are common.
Pick Trail Variants by Difficulty (So You Don’t Get Trapped on the Wrong Day)
A great self-guided route isn’t just one trail. It’s a main plan plus variants you can switch to when conditions change.
Read the route “grade” the same way every day
On Dolomites trail descriptions, difficulty often appears as labels such as hiking grades (commonly “E”/“EE” in Italian-style signage) or numeric trail ratings. What matters is what the grade implies on the ground:
- How much time the trail spends on uneven rock
- Whether you’ll be on exposed traverses
- How steep the climbs and descents are
When two routes look similar on a map, the easier option is often the one with fewer exposed sections and less loose scree—more comfortable even if the distance is a bit longer.
Use “exposure” as your choosing tool, not just steepness
In the Dolomites, exposure can be the difference between “fine with caution” and “not fine in rain.” When you’re picking variants, prioritize:
- Fewer exposed ledges if rain is likely
- More stable footing on gentler descents
- Trails that avoid technical sections if you’re not kitted for them
If your plan includes via ferrata-style terrain, make sure your variant logic also includes a no-ferrata fallback. The day you’re tired (or weather is damp), that fallback matters.
Match variants to specific rifugi arrivals
A practical way to choose variants is to work backward from your next rifugio.
Ask: “If I’m behind schedule, can I still reach this rifugio via a lower, less technical path?” If the answer is no, consider moving your main line to a stage arrangement where at least one alternate line lands at the same hut or a nearby one.
Lock in Hut Reservations Early—and Time Your Decisions Around Popular Weeks
In peak season, hut capacity is the real limiter. You’ll plan the route best when you know beds exist for your dates and that you won’t be forced into a late-day scramble for the next available option.
Know which rifugi require reservation pressure
Many Dolomite rifugi are popular in summer and fill quickly around:
- School holiday periods
- Weekends
- High-season weeks in July and August
Even when reservations aren’t strictly mandatory everywhere, it’s still common that you’ll get better outcomes (especially for dinner and a proper sleeping slot) by reserving.
Use reservation timing that scales with demand
Because rifugi operate on seasonal schedules and varying booking practices, you can’t use one “universal” opening date. But you can use a reliable timing strategy:
- Pick your tentative dates and corridor first.
- Start contacting/booking as soon as you’re confident about the corridor.
- Escalate faster the closer you get to peak weeks.
A good rule of thumb for planning is to treat peak-season reservations as “weeks matter”: if you wait until you’re already in the region, you may find that several of your preferred huts are already full.
Confirm the details that affect your route math
When a hut is full, you lose more than a bed—you lose your whole stage plan. So when you reserve, try to lock down the practical parts:
- Whether beds are assigned or first-come for arrivals
- Whether dinner and breakfast are included with your booking approach
- Whether there are limits on late arrivals
If your route is flexible, you can still reserve early by booking your main line first, then leaving room to rebook one stage based on weather.
Build Rain and Turnaround Options Before You Leave
Dolomites weather can change quickly, and storms can reshape a day. You’ll hike more confidently if each day has a “short plan” and a “safe plan,” not just a single track.
Design each day with a cut-off point (turnaround logic)
Decide your turnaround logic before you start hiking.
A simple method is to set a time buffer—when you reach it, you switch plans if conditions are worsening. For example, if visibility drops, the trail gets slippery, or storms are building, you do not push “just a bit further.” You transition to your short plan.
Your exact cut-off time depends on your daylight and how exposed the route is, but the principle stays the same: arrive at the rifugio with margin.
Create a rain variant that still solves the “next bed” problem
A rain-safe plan should answer two questions:
- Can you still reach a reachable rifugio (or safe stopping point) without climbing into higher exposed ground?
- Can you do it without relying on uncertain connections?
In practice, your rain variant usually means one of these:
- Lower-elevation trail lines (less risk, less lingering cold/wet)
- A shorter stage that still lands you at the next reserved rifugio
- A partial out-and-back that returns you to a safer junction
When you pick trail variants earlier, you’re making this step possible. If you didn’t, the rain day becomes a guessing game.
Plan your stage “edges”: start early, and avoid stacking risk
Self-guided routes work best when you reduce compounding uncertainty.
To do that:
- Start earlier on days where your main trail includes exposed or technical sections
- Keep your steepest descents for daylight when footing is calmer
- Don’t schedule a difficult ridge crossing right after a long, draining arrival day
If you keep the hardest terrain closer to your best energy period, your turnaround options remain meaningful (you’re not making them from exhaustion).
What to Do Next
Choose one Dolomites region corridor for your dates, then sketch two versions of each stage: a main trail and a lower-difficulty fallback that still reaches your next rifugio. Once your corridor is set, reserve beds for your peak-season dates first, and leave one stage flexible so weather can guide your final choice.
After that, test your route timing against a worst-case day: build your turnaround cut-off and make sure a rain variant still gets you to a booked place to sleep.