

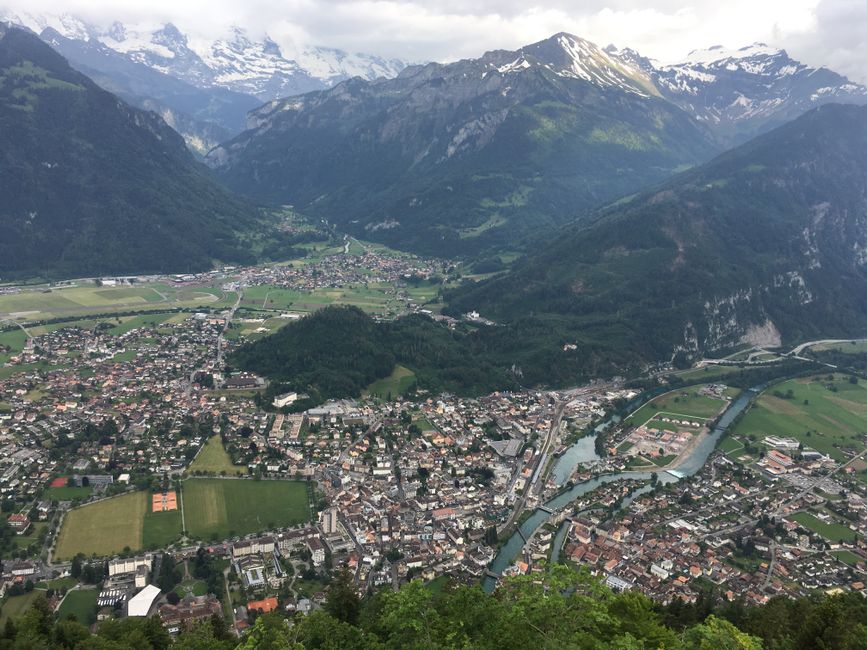
Planning a self-guided hiking day in the Swiss Alps from Interlaken is very doable—as long as you treat it like a decision, not just a route pick. Your best results come from choosing a hike that matches your pace and time window, buying tickets that fit how many mountain lifts you’ll actually use, and building in weather-and-turnback checks for altitude.
Below is an evergreen framework you can reuse for almost any day hike in the Interlaken region, with practical examples you can adapt.
Start With A Route Decision: Difficulty That Fits Your Day
Before you look at viewpoints and loop maps, decide what “easy” or “hard” means for you in mountain terms. In the Alps, the main variables are elevation gain, altitude, exposed sections, and how much time you’ll spend above the valley.
Use A Simple Difficulty Checklist (Not Just Distance)
Choose your hike using four quick filters:
- Elevation gain (climb), not mileage: a short-but-steep track can feel harder than a longer gentler walk.
- Time “on the hill”: aim for a hike that still leaves you buffer time for slow walking and photo stops.
- Surface and footing: well-maintained paths feel straightforward; rocky paths, ladders, and narrow ledges add friction.
- Exposure to weather: higher passes and open ridges are more affected by wind and storms.
If you’re unsure, pick the hike that requires fewer “unknowns” rather than the hike that looks most impressive on paper.
Set A Turnaround Time Before You Leave
For a one-day trip from Interlaken, a turnaround rule is essential. A good default is:
- Turn around with at least 90–120 minutes remaining before you risk missing the last mountain connection.
This turns your day into a controlled plan. It also helps when clouds thicken or you simply walk slower than expected.
Choose The Best Route Type For Your Comfort Level
As a guide, these route types usually match comfort levels:
- Valley waterfall walks and lake loops: great for an easy day with lower altitude exposure.
- Panorama trails from mountain stations: best if you’re comfortable at higher elevation and moving steadily.
- Ridge or pass sections: pick only if you have a strong weather window and confidence on uneven ground.
Use Interlaken As Your Launch Pad: Popular Self-Guided Options
Interlaken sits between multiple trail networks. You’ll usually start from a valley station (Interlaken and nearby towns) and then ride a train or mountain lift to the higher trailheads.
Here are six self-guided one-day options that work well for different fitness levels. Choose one that fits your time and comfort rather than trying to “see everything.”
6 One-Day Hike Ideas You Can Plan Around
- Harder Kulm Panorama Walk (Interlaken): A classic, mostly straightforward option for a lighter hiking day. The climb is more about reaching height than technical difficulty, and you can keep it flexible.
- First–Bachalpsee–First (from Grindelwald area): A good all-rounder hike with a scenic lake destination. It’s well suited to self-guided days because trails are clear and the route is usually popular.
- Wengen–Lauterbrunnen Valley Connections (valley-style walking): If you want mountain views without committing to a high pass, use the valley rail connections and focus on short-to-medium walking between viewpoints.
- Kleine Scheidegg–Männlichen Panorama Loop (from the Jungfrau corridor): A satisfying hike if you’re comfortable walking at higher altitude. Expect open views and plan extra time for changing light.
- Schynige Platte to Faulhorn Area (Panorama trail style): A more demanding day with big scenery. This is best when you have a stable weather window and you’re comfortable with sustained walking.
- Lauterbrunnen Valley Falls Circuit (local valley highlights): Great for an easy, low-commitment day. It’s ideal when weather is changeable because you can shorten the circuit and still get a rewarding experience.
How to pick between them: if you want flexibility and low commitment, choose the valley-style options. If you want maximum alpine panorama, choose the mountain-station trails—just be stricter about weather and your turnaround time.
Mountain Transport Tickets: What To Buy (And When To Combine)
In this region, most of your itinerary depends on mountain transport—trains and lifts that get you to trailheads. The ticketing decision is where travellers often overspend or end up with mismatched connections.
Use this framework to keep it simple.
Decide How Many Mountain Rides You Need
Start by counting what you actually plan to ride in one direction:
- One lift/rail hop + hike: you can usually buy a straightforward point-to-point style ticket for that mountain route.
- Multiple mountain segments in one day: consider a day pass or bundled option that matches the number of trips you’ll use.
- Only staying within one valley with short connections: you may not need the higher, more expensive mountain add-ons.
If your plan includes two separate mountain stations with a rail change, it’s usually worth comparing a day-based option against buying segments individually.
Buy Tickets That Match Your Expected Route, Not Your “Maybe” Ideas
A self-guided hike can still have a few fixed points: your start station and your return station. Tickets should align with those points.
A practical rule:
- If a ticket only makes sense for one specific return, don’t rely on it for a “weather might change” day unless you’re confident you can keep the return option.
Where people get stuck is buying an add-on for a high pass return, then needing to shorten the plan due to wind or thunderstorms.
Build Your Connection Buffer Into the Plan
Mountain transport runs on a timetable. If you’re hiking with changing conditions, plan for buffer time around the last connection.
Aim for:
- A return hike segment that still leaves you margin for slow walking and short shelter stops.
Weather And Altitude Safety Checks: The Checks That Actually Matter
In the Alps, weather changes quickly with elevation. A great route on paper can become unsafe—or simply miserable—when clouds drop, wind rises, or thunderstorms build.
Check The “Rule of Three” For High Mountain Safety
Use these checks before you commit to the highest or most exposed trail sections:
- Cloud ceiling and visibility: if you can’t see far ahead on ridges from the station, conditions can worsen fast.
- Thunderstorm risk: afternoon storms are common in summer. When you hear thunder nearby (or see rapid growth of storm clouds), treat it as a hard stop signal.
- Wind on exposed ridges: strong wind can make even well-maintained paths uncomfortable.
If any of these checks fail, choose a lower-altitude route or stay in valley terrain.
Watch Your Altitude Plan, Not Just The Weather
Altitude affects you even when the route looks easy.
Before starting, decide whether you’ll be walking:
- Mostly below the tree line: typically more sheltered and easier on the senses.
- Above the tree line: often more exposed to wind, sudden cold snaps, and faster weather changes.
If you’re climbing into higher zones, be conservative with turnaround time and carry layers you can add quickly.
Use A Turnback Trigger, Not Hope
Hope is a poor safety strategy on alpine days. Set a clear trigger in advance.
Common triggers to turn back or reduce the route:
- trail conditions become icy or slippery
- visibility drops and navigation becomes harder than expected
- you feel unusually tired compared to your normal walking pace
- you’re behind schedule and can’t meet your planned turnaround time
Pack And Plan For A Smooth One-Day Exit
Self-guided doesn’t mean improvising. A good plan is mainly about staying comfortable and making it easy to adjust if conditions change.
Pack In Layers, With Hydration And Navigation
At Interlaken, you can start warm and finish chilly once you move higher.
A sensible kit for most one-day hikes:
- Layers: a warm mid-layer and a weather layer you can pull on quickly
- Footing: trail shoes with grip (not just casual sneakers)
- Navigation: offline maps or saved route notes in case signal drops
- Water and snacks: enough for slow walking and an early return
- Sun protection: sunglasses and sunscreen, even on cooler days
If rain is possible, add a lightweight waterproof outer layer and plan to move a bit more slowly on slick surfaces.
Plan A “Shortcut” Option Before You Leave
When you’re hiking self-guided, you want a way to shorten the day without losing the whole afternoon.
Pick one shortcut strategy in your route planning:
- shorten by dropping to a lower station where the trail reconnects to the transport network
- cut by turning back along the same path if you’re confident on navigation
- switch to a valley walking segment that still keeps you near reliable transport times
This is one of the biggest differences between a fun hike and a stressful one.
Tell Someone Your Basic Plan
It’s a small step with big payoff. Share your intended route and your turnaround time so there’s context if you’re delayed.
Final Steps To Lock In Your Day
Choose one hike option from the list that matches your fitness and how flexible you want the day to be. Then confirm mountain transport decisions for your likely start and return stations, and do a weather/altitude check focused on wind, storms, and visibility before you commit to exposed sections.