

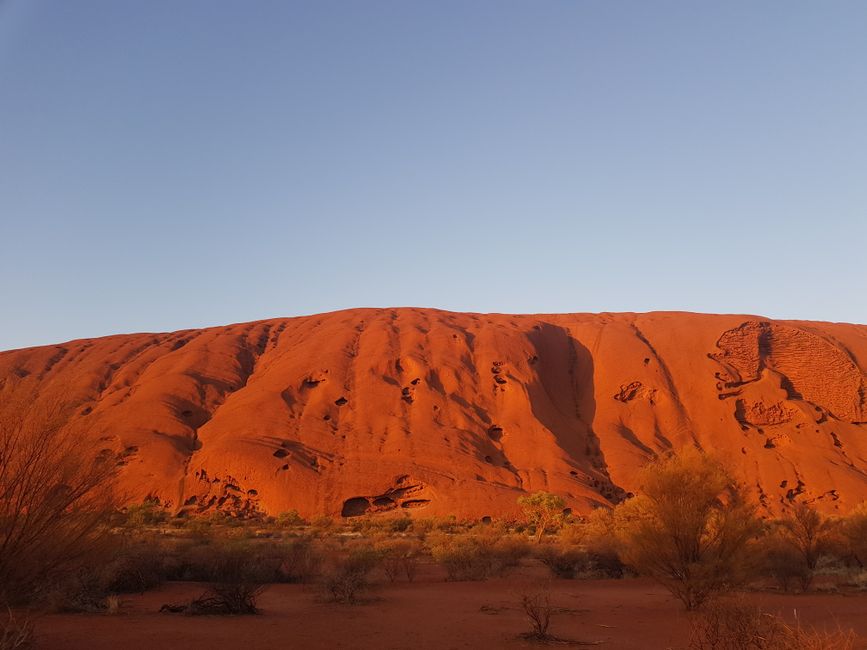
Booking and entry basics
What you need at the park gate
To visit Uluru and the surrounding areas, you’ll need the right entry for Uluru-Kata Tjuta National Park. For most travellers this is a per-person park pass, bought ahead online or secured at the usual points on arrival. If you’re driving yourself, keep the confirmation details accessible in your phone (and consider a printed copy if you like belt-and-braces).
Before you leave your accommodation, check:
- Whether your park entry covers the day you’re travelling (some passes are date-specific)
- Whether any areas you want to visit require separate entry
- If you’re travelling with a group, who the booking is under
Sunrise viewing tickets and check-in
The Uluru sunrise viewing area is typically ticketed/managed, even for self-guided visitors. That means the “logistics” part isn’t about directions—it’s about getting into the right place at the right time.
What to plan for:
- A reserved ticket time window (start times vary by season)
- A check-in process before viewing starts
- Extra time for getting parked and finding your spot in low light
Treat sunrise bookings like an appointment. If you arrive late, you can lose your place in the line and the sunrise timing can’t be recovered.
Cultural Centre access and ticketing
The Uluru Cultural Centre experience is usually straightforward for day visitors, but rules can differ by season and event programming. Some parts of the experience are included with general park access, while others may have their own capacity management.
To avoid surprises, confirm two things before you go:
- Whether you need a separate booking for the Cultural Centre (or any specific activity within it)
- The entry timing you’re expected to use on the day
If you’re travelling in the busy season, it’s also wise to lock in your preferred day for the Cultural Centre early.
Time-blocking from your base
Pick a base and set your drive time buffer
Most self-guided day trips start from Yulara / the Uluru resort area, where you can access the park roads quickly. Your plan will depend on whether you’re:
- Using your own rental vehicle
- Borrowing an on-site vehicle
- Relying on resort transport
Either way, build a buffer for:
- Wildlife on the road (it happens)
- Slow-moving traffic near viewing points
- Low-light walking time between the car park and viewpoints
As a rule of thumb, don’t plan for “just a quick drive” on sunrise day. Leave enough time so you’re not rushing in the last 15 minutes.
Build an order that avoids stress and crowds
Uluru days go smoothly when you separate “indoors + information” from “outdoors + weather.” A practical order is:
- Do the sunrise viewing with enough buffer for parking and dark-walking
- Then shift into the Cultural Centre after you’re warm and fully awake
- Add one short Uluru-area walk if the conditions are good
If you do the Cultural Centre first, sunrise can feel rushed. If you leave it too late, the morning light you wanted for photos may not happen.
A realistic schedule template (adjust to season)
Below is a template you can adapt using the sunrise time shown for your travel dates. Think in ranges, not exact minutes.
Typical flow
- 2–3 hours before sunrise: Depart your base with lights on and water already packed
- 60–45 minutes before sunrise: Arrive at the sunrise parking/check-in point so you can settle before it gets busy
- During/after sunrise: Stay until the first “full light” moment, not just the instant the sun crests
- Late morning: Cultural Centre visit (use this time to absorb stories and maps)
- Lunch + short walk (optional): One low-effort walk if conditions allow
- Afternoon: Drive back with a calm pace—don’t squeeze the return at the last second
For your day trip checklist, keep these items in mind (and use them to time-block your route):
- Uluru Cultural Centre
- Uluru Sunrise Viewing Area
- Kuniya Walk (short, guided-style self-paced option depending on conditions)
- Mutitjulu Waterhole (a key area near Uluru’s base)
- Kata Tjuta (use as a weather backup if you still have daylight)
Uluru Cultural Centre self-guided plan
Start with the exhibits and your “big themes”
Treat the Cultural Centre as your planning engine. Even if you’re self-guiding, you’ll get more out of the day if you leave with a few themes to look for outside.
Before you step deeper into the galleries, decide what you want to understand, for example:
- The cultural meaning of places around Uluru
- How stories connect to the landscape
- How seasons and water shape daily life
Then work through the exhibits at your own pace—pause when something clicks and note where you might want to look later.
Choose a short walk that matches your energy
After sunrise, you don’t want to start your day trip with a long, physically demanding plan. If you’re feeling good, you can add one short Uluru-area option to connect what you saw indoors with the ground beneath your feet.
For many travellers, a simple approach works best:
- Warm up at the Cultural Centre first
- Walk only when visibility is good
- Keep it short if the heat rises quickly
If you’re unsure which walk fits your fitness level, ask staff for the easiest option on the day.
Photography and accessibility notes
Uluru is photogenic, but the Cultural Centre is also where you’ll want to think about what you’re photographing and why.
Practical tips:
- Keep your camera ready, but expect quiet spaces—move slowly
- Check whether photography is allowed in all galleries
- If you’re bringing mobility aids, arrive early enough to settle without rushing
If you’re sensitive to light (very early mornings can be a lot), consider wearing sunglasses and planning your shots during daylight hours.
Sunrise viewpoint logistics
When to arrive and what to pack for cold mornings
Sunrise day is all about timing, and timing starts before it’s bright. Even in warm seasons, mornings near Uluru can feel chilly.
Pack for “warm in layers,” not “warm in one thing.” A solid kit includes:
- A warm layer you can put on quickly
- Closed-toe shoes with decent grip for dark ground
- Headlamp or small torch for the walk to your spot
- Water (small bottle is fine) and lip balm
- Phone battery pack (sunrise photos drain batteries)
If you’re going for long exposure or careful compositions, give yourself extra time to set up. Sunrise gets busy and the light changes fast.
How self-drive and parking usually work
You’ll typically drive to the designated sunrise access area, then follow marked routes to your viewing spot. What slows people down is not the distance—it’s finding the correct parking and getting sorted while it’s still dark.
To keep it simple:
- Arrive with enough time to park calmly
- Keep valuables out of sight during the wait
- Stick to any staff instructions for vehicle movement
If you’re travelling in a group, assign one person as the “parking and ticket check” lead so everyone else isn’t wandering off before check-in.
Viewing etiquette and safety
Sunrise viewpoints can get crowded, and the best atmosphere comes from staying considerate.
Safety and etiquette checklist:
- Don’t step off marked areas for a better shot
- Keep the torch/headlamp pointed down while walking
- If you’re using a tripod, set it up early and avoid blocking others
- Expect some people to move around as the light improves—don’t lock in your position too aggressively
For kids and anyone with mobility limits, choose a spot that reduces walking and keep your plan flexible.
Weather and low-light alternatives
Overcast plan: swap sunrise intensity for a stronger Cultural Centre session
If sunrise turns into a flat grey sky, you can still have a great day—just shift the priority.
A practical low-light order is:
- Keep the morning Cultural Centre visit as the “anchor”
- Add a short Uluru-area walk later when visibility improves
- Use the sunrise viewpoint as a quick check-in rather than a long standstill if conditions are unsafe or uncomfortable
If you’re already booked for a sunrise slot, arriving and then adjusting your expectations is better than trying to force a perfect view.
If roads or visibility are limited: stick to the Uluru area
When wind, heavy cloud, or dust reduces visibility, it’s not the day to chase extra destinations.
Instead, focus on what’s close and manageable:
- Uluru Cultural Centre at your own pace
- A short walk near Uluru’s base if paths are open and clearly defined
- Relaxed photos where lighting is consistent
Always follow park signage and staff advice. Self-guided doesn’t mean ignoring conditions.
For clearer light later: late morning or a second round
If the morning is disappointing but the day improves, you have options without breaking your schedule.
Common “rescue” approaches:
- Return to a viewing area when the sky clears (later light can be surprisingly good)
- If you have daylight, consider Kata Tjuta for a later slot instead of a second Uluru sunrise attempt
This works best when you have a flexible afternoon and haven’t timed your return too tightly.
Next steps: lock in your day trip
Confirm bookings and keep details accessible
Before you go, double-check every required entry for the day: park access and any sunrise viewing reservation rules. Save the confirmation details offline in your phone so you’re not hunting for Wi‑Fi in the morning.
Do a timing check with a “test departure” mindset
Rehearse the plan mentally: when you leave your base, when you arrive at parking, and how long you’ll need to reach your viewing spot. If your plan feels rushed on paper, adjust now—there’s no time to fix logistics once it’s dark and everyone is moving.
Build a simple comfort fallback
Keep your day trip comfortable with a backup for the energy dips that come with early starts: extra water, a warm layer, and a plan for lunch that doesn’t depend on finding the “perfect” timing at the last minute.