

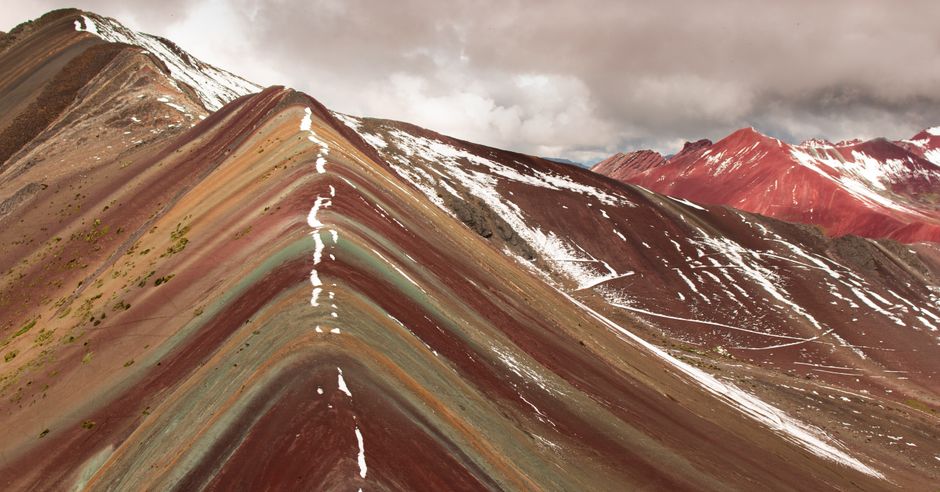
Rainbow Mountain (often called Vinicunca) is one of the most demanding day hikes you can do from Cusco. Even if you’re travelling independently, you’ll still be managing three real variables: altitude, getting to the trailhead early enough, and having a safe, realistic turnaround plan for the return journey.
Below is a practical blueprint for a self-guided day trip, with route options, pacing guidance, packing essentials, and buffers that protect you from delays.
Rainbow Mountain Altitude and Day Plan From Cusco
What Altitude Feels Like Above 5,000m
Cusco sits at roughly 3,400m. Rainbow Mountain is commonly hiked around the 5,000–5,200m range. That jump is why the day can feel much harder than the distance suggests.
For planning, treat this as a hike where breathing rate and stamina matter more than speed:
- Expect slower walking even if you feel “fine” at first.
- Plan for cold mornings and harsher wind as you go higher.
- If you’re prone to headaches or nausea at altitude, build extra conservatism into your schedule.
A Realistic Pacing Strategy for the Climb
For a self-guided day, pacing is your best tool. The easiest mistake is going out too fast because the first section feels manageable.
A pacing approach that usually works:
- Start at a deliberately slow, “talk in short sentences” effort.
- Take frequent micro-breaks (a minute or two) rather than long stops.
- Keep your body cool where possible (layers you can remove) so you don’t overheat during the ascent.
If you can’t control breathing early, you’ll lose time later—either by slowing dramatically or needing extra recovery.
Why the Day Feels Long Even With a “Quick” Hike
The hike is only part of the story. Your door-to-door time includes long road sections, waiting for transport, ticket handling at the access area, and the fact that you’ll likely move slower at altitude.
Most travellers should plan the day as a full commitment rather than a “half-day outing.” Build your plan around getting to the trailhead early and having enough daylight and buffer for the descent.
Route Options: Tour, Private Transfer, or Public Transport
Shared Tours: Simplest Logistics
A group tour is usually the least stressful option if your priority is minimizing coordination. You’ll typically get a scheduled early departure, vehicle to the staging area, and a set return time.
This option can be worth it if:
- You don’t want to manage the logistics of buses/minivans.
- You prefer a predictable pickup and return.
- You’re travelling with limited time and want a low-effort plan.
Private Car + Driver: Flexibility With a Higher Cost
A private vehicle is a middle ground. You still need to plan the same basics (timing, access handling, and your hike turnaround), but you can be more flexible about pauses and timing.
A private transfer can help if:
- You’re sensitive to crowds and want smoother pacing.
- Your travel dates don’t match common shared tour departures.
- You want to adjust based on how you feel after acclimatising.
The trade-off is cost. Expect private transport to be materially more expensive than shared tours.
Public Transport: Budget-Friendly, But More Moving Parts
Self-guided using public transport is possible, but it requires more planning and more patience. The usual pattern is to get out of Cusco toward the regional hub near the access area (often via shared minibus/collectivo routes), and then arrange the final short ride toward the trailhead.
Public transport can work if:
- You’re comfortable coordinating multiple legs and timing your return.
- You have a clear plan for how you’ll get back after your hike.
- You can handle schedule shifts and avoid rushing.
The biggest practical challenge isn’t the hike—it’s guaranteeing transport back to Cusco on time without last-minute pressure.
Booking and Starting Logistics
Choose Your Departure Window (And Don’t Underestimate Early Starts)
For Rainbow Mountain, the day usually starts very early. Morning light helps visibility and you’re less likely to hit the worst of midday crowds and slowdowns.
When planning your start, aim for a timeline that gets you to the trailhead with time to settle in, use the restroom if needed, and begin at a pace you can maintain.
If you’re using public transport, add buffer for uncertainty: waiting time, road conditions, and how long ticket/access handling takes.
Confirm Trail Access and How the Return Ride Will Work
With a self-guided plan, “booking” is mostly about preventing gaps. Before you commit to a route, make sure you can answer these questions:
- How will you handle entry/ticketing at the access point?
- What’s the realistic return pickup/meeting point for your transport back?
- Who is responsible for delays—your driver, the group, or your own follow-up?
For shared tours, the tour operator handles most of this. For private transfer, you typically confirm timing and access logistics with your driver in advance. For public transport, you need a plan that doesn’t assume someone will instantly find you a ride when you’re tired.
Altitude Safety Basics for a Self-Guided Day
You can’t “out-plan” altitude, but you can reduce risk with simple rules:
- Do not treat this as a race. If symptoms show up, slow down or turn back.
- Keep communication simple: choose a meetup plan if you’re travelling with others.
- If your condition changes, prioritize descent and transport back over reaching the viewpoint.
If you’re arriving directly from sea level after only a short rest in Cusco, the day may be too ambitious. Plan acclimatisation time so your body has a chance to adjust.
What to Pack for a Self-Guided Hike
Clothing and Weather Gear for Wind and Cold
Even in warmer months, conditions can feel harsh at altitude. You’ll benefit from layers you can adjust as your effort changes.
A dependable layering approach:
- Base layer to manage sweat.
- Warm mid-layer for cold air and wind.
- Windproof outer layer for exposed sections.
- Hat and gloves you can actually keep on during stops.
Rain or snow can happen depending on season, so be prepared for wet trail surfaces and colder wind once the light shifts.
Comfort Items and Power Management
Cold weather can drain phones faster. Bring a way to keep essential items protected and usable.
Pack items that support your pace and comfort:
- A headlamp if you want peace of mind for any schedule delays on the descent.
- Sunglasses (glare can be intense at elevation).
- Trekking poles if you’re comfortable using them; they can reduce strain on the way down.
Also consider whether you’ll have signal for transport coordination—often you won’t, or it will be inconsistent.
Food, Water, and Cash
Plan for steady energy because climbing at altitude often makes it harder to eat quickly. Bring snacks you can manage while keeping your breathing controlled.
Keep a reliable amount of water and small cash for any entry handling or last-mile transport costs. You don’t want to rely on card payments or last-minute ATM access while you’re tired.
Turnaround-Time Buffers and Weather Checks
Build in Extra Hours for Delays
Self-guided doesn’t mean “same-day, zero margins.” Vehicle waiting times, slower hiking due to altitude, and weather changes can all stretch the day.
A good rule of thumb is to plan your schedule so the turnaround decision happens before you’re rushed—giving enough time to descend calmly and still reach your arranged return.
If your transport depends on a specific pickup time, treat that time as fixed and work backwards. Add buffer for real-world delays rather than hoping conditions stay ideal.
Know When to Turn Around (Even If You’re Close)
Turning around at altitude is often the right call. If symptoms worsen—headache that escalates, dizziness, nausea that doesn’t settle—descending is the priority.
Even without severe symptoms, turn around if:
- Your pace collapses and you can’t maintain controlled breathing.
- You’re getting progressively weaker.
- Weather visibility drops and you can’t navigate safely.
The viewpoint is important, but safe descent is more important.
Plan for the Ride Back to Cusco
The descent can take longer than expected because legs are tired and the body stays more sensitive at altitude. Once you finish the hike, you’ll still need time for transport coordination.
To reduce stress:
- Keep your meeting point and return plan simple.
- Don’t assume the same vehicle you came in on will be immediately available.
- When planning, remember that even if the trail is “downhill,” fatigue still affects how quickly you can move.
Final Steps Before You Go
Before your day trip, lock your transport plan first, then build the hike plan around it. If you’re travelling as a group, agree on a turnaround rule based on how you feel, not on peer pressure.
Finally, make your schedule conservative: start early, move at a controlled pace, and keep enough margin that a slower-than-expected day doesn’t force risky decisions.