

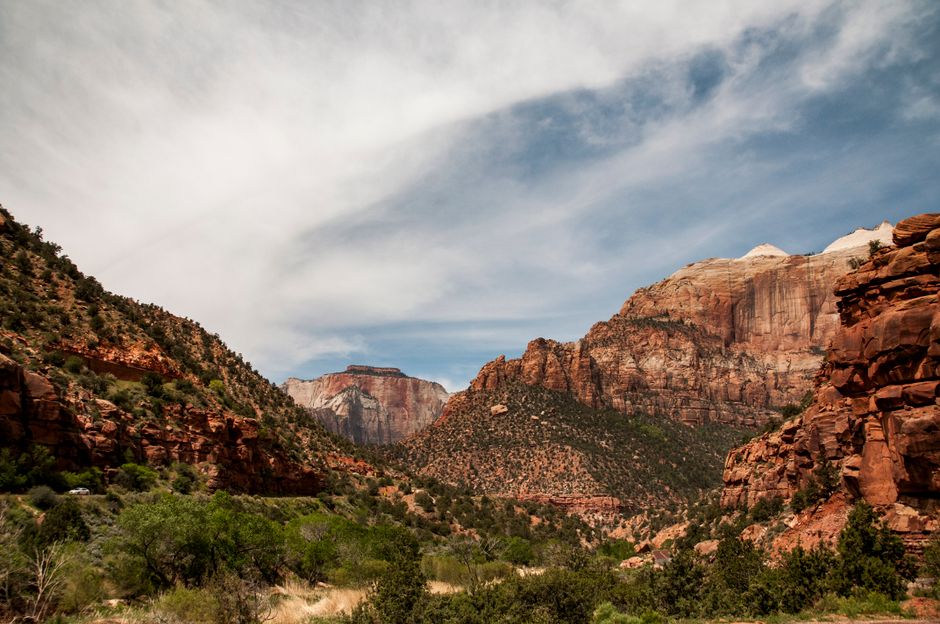
A self-guided Zion day trip from Las Vegas works best when you treat it like a timed logistics exercise first, and a hiking day second. Start early, sort out entry rules before you arrive, and keep your driving minimal inside the park by using shuttles.
Driving Las Vegas to Zion National Park: Realistic Timing
From Las Vegas to Zion National Park (the main access area near Springdale) is typically a little under 3 hours each way under normal traffic. On a busy holiday or in summer, you can lose extra time around Las Vegas exits, on highway merge points, and at the park entrance.
Pick the right arrival window
If you want parking options and fewer shuttle lines, aim to arrive in the first half of the morning. Later arrivals often mean full lots and more time circulating.
A practical rhythm looks like this:
- Drive: about 2.5–3.5 hours depending on traffic
- Time buffer: plan at least 30–45 minutes for entrance processing and shuttle waits
- Time in Zion: 6–9 hours is realistic for an enjoyable self-guided day
Decide whether you’ll return the same day
A day trip is very doable because Zion’s main sights are concentrated along the Zion Canyon corridor and accessible by shuttle. If you’re prone to foot soreness or you’re traveling with kids, you’ll still enjoy it—but you’ll want a route with shorter hikes and clear turnarounds.
Leave room for entrance and shuttle delays
Zion is popular, and entry rules can change by season. Even when the entrance is smooth, shuttles can back up when lots fill. This is why your “plan” should include a simple fallback hiking option (short walks instead of committing to a long route).
Tickets, Entry Reservations, and Shuttle Basics
Zion National Park uses entrance fees and, during peak periods, often requires advance reservations for vehicle entry timing and/or vehicle access. The exact system can vary by season, so you should confirm the current requirements before you leave Las Vegas.
What you should confirm before you drive
Before your day trip, check three things:
- Whether entry requires any advance reservation or timed entry
- The entrance fee method that applies to your group (vehicle vs. pass type)
- Whether the shuttle system is operating as your plan for getting to trailheads
Arrive with the right approach
On arrival day, the goal is to avoid “drive in circles” time. If reservations are required, make sure your details match your vehicle and the timing you selected.
Once you’re in the access area, you’ll usually route yourself toward Springdale and shuttle pick-up points rather than trying to park once and walk everything.
Use shuttles to keep your day relaxed
The Zion Canyon shuttle is the reason a day trip feels manageable. It reduces backtracking and parking stress, especially if you’re doing hikes that start at different canyon points.
A simple rule: if you can reach a trailhead by shuttle, do it. Save your energy for the walking routes.
Parking in Springdale (and Getting Into the Canyon)
Your parking strategy should assume that the park corridor gets busy and that inside-park parking fills earlier than you expect on weekends and summer weekdays.
Park in Springdale and plan to shuttle
In practice, the easiest self-guided approach is to park in/around Springdale and then use shuttles to access the Zion Canyon trailheads.
What to aim for:
- A spot close to a shuttle stop so you can get moving quickly
- A parking location that’s not your farthest walk from the shuttle route
- Flexibility: if you arrive mid-morning and lots are full, you may need to switch to a different Springdale area parking option
Know what not to do
- Don’t count on being able to park right at every trailhead.
- Don’t leave your car search until you’re already late for the hikes you want.
- Don’t build a plan that depends on “finding the best parking near the trail” as your primary strategy.
Bring the right basics for the walk-to-trail moment
Once parked and shuttled in, you’ll likely do repeated short hops: shuttle stop to trail, trail to shuttle stop, and back. Have water accessible, and keep your schedule light enough that you don’t feel rushed on the last 1–2 hours.
Your Self-Guided Walking Route: Canyon Views With Minimal Backtracking
This is an easy, coherent day plan that uses the shuttle to reduce driving and focuses on popular canyon scenery without requiring advanced navigation.
Step-by-step route (follow this order)
Use the shuttle to progress through the canyon from the lower stops toward the viewpoints, then do your main “effort hike” and come back by shuttle.
Start with these listed stops/trails:
- Riverside Walk (starting near Temple of Sinawava for an easy, scenic introduction)
- The Grotto (a convenient shuttle stop for quick photo stops and access to short side paths)
- Weeping Rock (a must-see viewpoint area if you want classic canyon views)
- Canyon Overlook Trail (your main hike; expect a moderate climb)
- Pa’rus Trail (an optional flat, lower-canyon walk to finish without exhausting yourself)
How long it usually takes
For most visitors, a comfortable pacing looks like:
- Riverside Walk + viewpoints: 1.5–3 hours
- Canyon Overlook Trail: allow about 1.5–2.5 hours total (including time at the top)
- Optional Pa’rus Trail segment: 45–90 minutes
If you want to keep it truly “day-trip easy,” treat Canyon Overlook as your anchor hike and keep everything else flexible.
Simple “if things slow down” adjustments
If you hit crowds at a shuttle stop or the line feels long, you still have options:
- Skip Pa’rus Trail and do only the canyon loop portions that are closest to your current shuttle stop.
- If Riverside Walk feels crowded, shorten it and turn around earlier.
- If you don’t feel good after the Overlook climb, aim for easier flats rather than adding extra canyon miles.
Backup Trails for Late Morning or Bad Weather
Zion’s weather can change quickly, and the busiest times can line up with the time you planned to hike longer trails. Having a backup plan keeps your day enjoyable even when conditions aren’t perfect.
Choose one “Plan B” hike
If your main route is running late, pick one of these listed alternatives and keep the rest of the day simple:
- Emerald Pools Trail (Lower Pool) for a shorter, rewarding option
- Emerald Pools Trail (Middle/Upper) if you still have energy and want a longer walk
- Watchman Trail (short section/viewpoint) if you want canyon views with less back-and-forth
When you should lean toward shorter options
Consider shorter, lower-effort hikes when:
- You arrive later than planned and shuttle waits are long
- Heat is building (summer afternoons can feel intense)
- You’re traveling with kids or anyone who wants predictable turnaround times
Stay safe on Zion trails without overthinking it
A self-guided day trip is about balance: you’re exploring, but you’re not racing. Stick to marked routes, watch footing near slick rock, and keep enough water for a “turnaround earlier than planned” scenario.
Final Thoughts: Lock in Entry and Start Early
Your best chance at a smooth self-guided day trip from Las Vegas is to start early, confirm the current entry and reservation requirements, and use Springdale parking plus the shuttle to avoid stress inside the canyon. Once your entry and timing are set, follow a simple on-foot route first—then add one backup hike only if you’re still feeling good.
If you want, share your dates and group details
If you tell me when you’re going and whether you want mostly easy walking or you’re aiming for Canyon Overlook, you can refine the route and timing to fit your pace.