

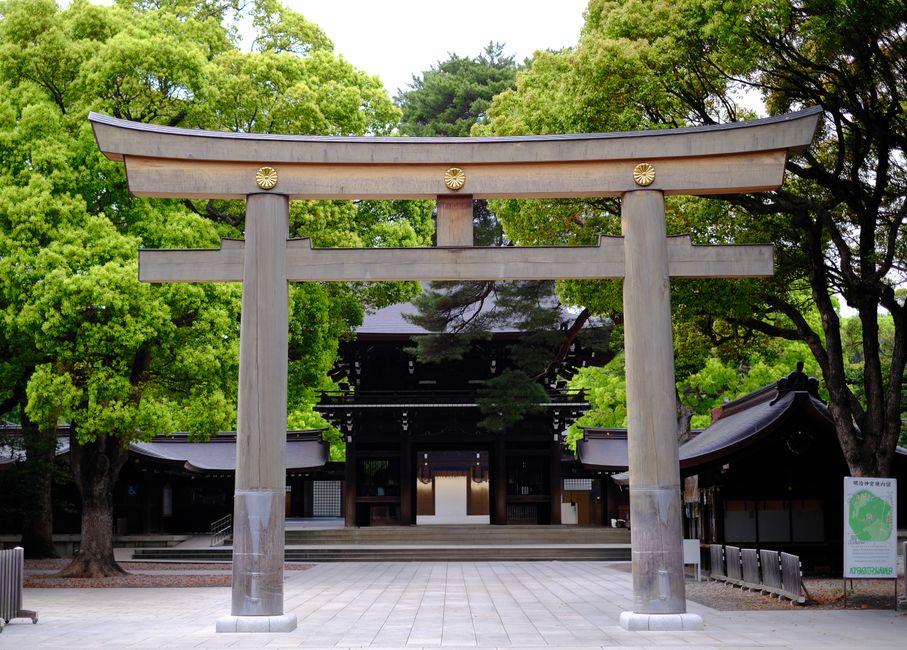
Planning a self-guided day around Meiji Jingu and Harajuku can feel like juggling two different moods: quiet forest walking, then busy shopping streets. The trick is simple: keep the route tight, group sights by area, and build in breathing room around the places that get crowded.
Below is an easy one-day loop with entry notes and a time plan that won’t have you rushing for trains or queueing through the busiest streets.
Get the Timing Right: Beat Crowds Without Wasting Time
Start early, but don’t aim for extremes
You’ll enjoy Meiji Jingu most when the main paths are calm. Aim to be there close to when the area first wakes up, then spend enough time that you’re not forced to “finish before it gets busy.”
Use a “slow first, lively later” rhythm
A reliable pattern is:
- Morning: shrine and forest walking (slow pace, fewer distractions)
- Midday to afternoon: Harajuku streets (more people, more stops)
- Late afternoon: greener spaces (faster to enjoy, less queue pressure)
Build buffers around the busy streets
Harajuku’s most famous lanes—especially around Takeshita—can spike in crowd density late morning through early evening. For a calmer day, you’ll want to either arrive before the biggest rush or pass through the busiest stretch when you would normally be eating.
Entry and Tickets: What You Need (And What’s Usually Free)
Meiji Jingu grounds: generally free to enter
You typically don’t need a ticket to enter the shrine grounds and walk the main approaches. Expect a respectful atmosphere where people may pause longer than you’d expect—factor in time for slower walking.
On-site buildings may be separate tickets
If you want museums or special exhibition spaces inside the wider Meiji Jingu area, those can be separately ticketed. Keep this simple:
- Plan your core visit around walking the shrine grounds (free)
- Treat any exhibition building as an optional add-on only if you still have time
Transport costs: budget for “a few rides,” not a pass
For a one-day loop inside Harajuku/Shibuya, you can usually rely on short walks plus one or two rail/subway hops if you want to reduce walking. Using an IC card (like the ones you tap at station gates) keeps it easy—fares are typically a few hundred yen per ride, depending on route length.
Your One-Day No-Rush Loop (Walking + One Short Transit Hop)
This plan assumes you start in the Harajuku/Shibuya side of town and want to move smoothly between nearby districts. Total time is about 7–9 hours of “awake exploring,” with breaks.
Stop 1: Meiji Jingu Shrine Forest Approach (1.5 hours)
Why here first: It’s where the day feels like it’s “starting,” not bouncing between streets.
- Walk slowly through the main entrance area and deeper forest paths.
- If you want photos, keep them short—people often stop unexpectedly.
- Expect the pace to feel slower than you planned, because it’s calmer and you’ll naturally linger.
Entry note: The grounds are generally free to enter; you’re mainly paying in time.
Stop 2: Meiji Jingu Gaien (1 hour)
After the shrine, shift to the Meiji Jingu Gaien side to vary the scenery with open green space and landscaped grounds.
- Walk your route at a “no hurry” speed and treat this as a reset.
- If you’re interested in any on-site museum or exhibition, decide early—otherwise you can lose momentum.
Entry note: Much of Gaien’s outdoor grounds is generally open, while specific exhibition buildings can be separate ticketed experiences.
Stop 3: Omotesando Boulevard (45–60 minutes)
Omotesando is where the mood shifts from forest quiet to city design—tree-lined, spread out, and more comfortable for wandering.
- Take it as a stroll street, not a shopping mission.
- Look for calmer side streets parallel to the main avenue so you’re not fighting shoulder-to-shoulder foot traffic.
Pacing tip: This is a good place to pause for a drink or snack so you don’t feel “behind” later.
Stop 4: Takeshita Street (35–50 minutes)
Takeshita is the fastest way to get Harajuku’s signature energy—but it’s also where rushing feels most tempting.
- Plan to walk through, not “shop thoroughly.”
- Choose one or two items max (snack, small accessory, souvenir), then move on.
- If the crowd density gets uncomfortable, step into a nearby side lane and come back for a quick second pass.
Crowd reality check: Midday to early evening is often busiest. You’ll have a better experience if you treat this stop as time-boxed.
Stop 5: Harajuku Backstreets (25–40 minutes)
To avoid feeling stuck in the main flow, use the time between big streets to explore calmer lanes around Harajuku.
- Look for small fashion boutiques and café rows tucked just off the biggest arteries.
- This is also where you can slow down for photos without blocking foot traffic.
Pacing tip: If you’ve been walking for hours, this is a great moment to switch from “continuous movement” to “browse with purpose.”
Stop 6: Yoyogi Park Finish (45–75 minutes)
End with a green space you can enjoy without negotiating street crowds.
- Take an easy loop through the park edges.
- If the weather is mild, linger here longer than you think you should—this is your recovery zone.
Optional transit simplifier: If your legs are tired, take a short rail/subway hop for the final link back toward your next neighbourhood (or your hotel area) instead of walking the long way.
Don’t Rush the Details: Breaks, Food Timing, and Photo Strategy
Schedule breaks like you’re on a timeline, not “whenever you feel tired”
A no-rush day usually has built-in pauses. Try something like:
- One planned coffee or drink around Omotesando
- One planned snack tied to your Takeshita time-box
- A longer sit-down or picnic-style moment near Yoyogi Park
Even if you don’t book anything, you’ll feel less pressured.
Photo strategy: pick fewer shots, take them slower
In Meiji Jingu and Harajuku, the best photos often come from patience rather than distance.
- At Meiji Jingu, move to a slightly quieter angle and wait for people to pass.
- At Takeshita, aim for “street texture” shots from the edges, not in the center.
Avoid the tourist-trap feeling by limiting the “must-do list”
If your plan includes too many high-demand activities, you’ll start micro-rushing. Keep it simple:
- One signature street (Takeshita)
- One main boulevard (Omotesando)
- One green finish (Yoyogi Park)
If you still have energy after that, you can explore further—without turning the day into a checklist.
Booking and Planning Essentials (So You Don’t Over-Commit)
You usually don’t need tickets for the core sights
For this loop, the main attractions are typically walk-in experiences. You mainly need to be ready for:
- Crowd variation (especially around Harajuku’s busiest lanes)
- Your own energy level, not ticket constraints
If you want an exhibition, decide early
When you’re choosing between “keep moving” and “add an exhibition,” decide around the time you’re entering the wider Meiji Jingu/Gaien area. That way you don’t lose your timing when the day gets busier.
Restaurants: keep it flexible unless you have a must-try
In these neighbourhoods, popular places can have short lines or longer waits depending on the hour. A no-rush approach works best when you:
- Choose food that matches where you already are in the plan (Omotesando for a calmer sit, Harajuku for quick snacks)
- Accept that “best timing” matters more than “best choice”
Next Steps: Lock in Your Route and Pace
Before you go, save the mental map: Meiji Jingu first, Gaien next, then Omotesando into Takeshita, and finish in Yoyogi Park. Once you’ve set that order, plan your day in blocks—so you can adjust when crowds rise without turning it into a sprint.
If you tell me your travel month and where you’re staying (Shinjuku, Ginza, Asakusa, or elsewhere), the day plan can be tightened to your exact arrival and departure timing.