


Galle’s Dutch Fort is compact enough to explore on foot, and the promenade-style sea edges give you an easy second half to the day. If you plan your route around sun direction and peak crowd times, you’ll get steadier light for façades, walls, and wave action—without doing laps in the hottest hours.
Plan Your Walk: Start Points, Loop Length, and Timing

- Morning (softer light for buildings): Start inside the fort so façades and doors don’t fight the glare.
- Late afternoon (strong contrast for walls): Start from the ramparts/seaward edge so you can work toward sunset angles.
- Midday (best for shadows only): Use this time to move between shaded lanes and ticketed indoor stops.
Use a simple 2–3 hour loop (then extend)
For a first photo walk, plan on:
- Inside the fort: 60–90 minutes of streets + key church/clock landmarks.
- Ramparts/walls: 45–60 minutes for sea-facing angles.
- Sea edge + lighthouse end: 30–45 minutes for waves and wide views.
If you want more variety (and fewer people in each frame), build in an extra 45–60 minutes before sunset.
Build in shade and water breaks
Galle’s warm coastal weather can feel heavy when you’re walking stone streets and uneven ramps. A good strategy is to shoot in bursts (10–20 minutes) and then reset in the shade.
Practical pauses:
- Stop when the sun climbs high and switch to interior courtyards or shaded lanes.
- Carry water and take advantage of any shaded public areas near churches and museums.
- Wear shoes with grip—fort lanes can be slick and the sea edges can be uneven underfoot.
Galle Dutch Fort Streets: Where Architecture Photos Look Best
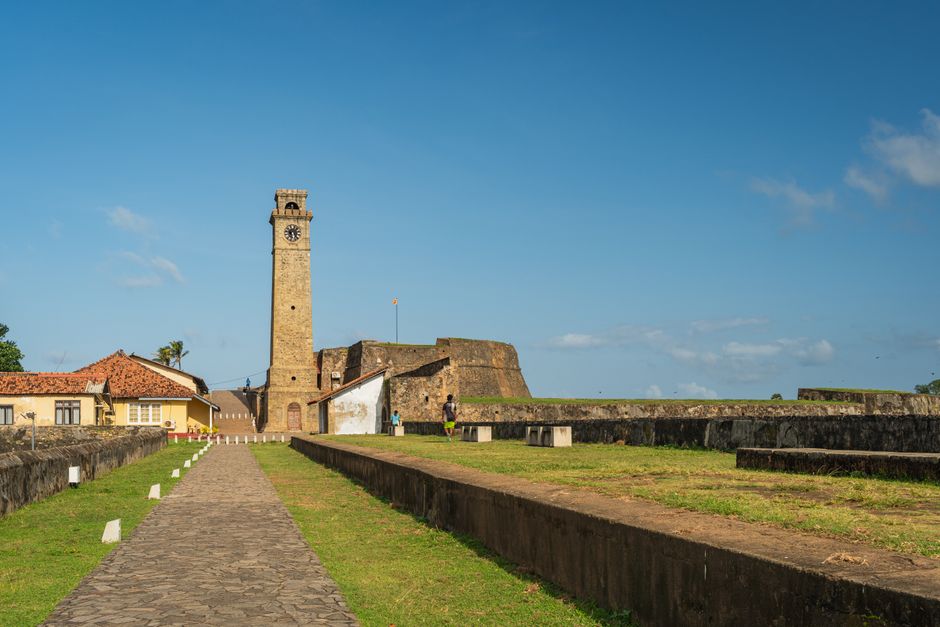
Inside the fort, these are reliable photo stops:
- Clock Tower junction (street-corner compositions): Great for lining up colonial-era façades with sky space.
- Dutch Reformed Church (facade detail + calm street angles): Useful when you want symmetry-style frames.
- St. Mary’s Cathedral (color, stone, and street context): Strong for wider shots that include the lane geometry.
- Dutch Hospital Shopping Precinct (arches and courtyard feel): Good for repeating patterns and softer, even light.
- Main Gate area (the “entry moment”): Works for establishing shots that show scale and entry textures.
- Ramparts walkway start inside the fort (transition from street to sea): Use this as your pivot point between architecture and ocean photography.
Shoot doors, shutters, and street-level texture
These details photograph best when:
- The light is side-on (morning or late afternoon), so wood and stone show depth.
- You’re not standing directly under harsh midday sun—then everything turns flat.
If you want a quick method, try this:
- Lower angle close-ups (handles, hinges, window frames)
- Eye-level repeats (same street segment in two different corners)
- Step back for context (let the fort’s walls frame the shot)
Keep your background clean in busy lanes
Galle Fort can get crowded, especially when tour groups move through. You’ll get better keepers by:
- Choosing one “quiet lane” per stop rather than stopping in the middle of the main path.
- Waiting 30–60 seconds for the crowd to shift before you shoot a final frame.
- Using your lens wider for architecture shots, then cropping—this reduces the need to chase an empty frame.
Fort Walls and Bastions: Viewpoints by Direction
East-facing stretches: early light and calmer streets
If you’re walking during the first part of the day, you’ll often find better results on wall sections that face roughly east:
- Look for textured stone, guardrail lines, and openings where the fort’s geometry leads the eye.
- Shoot façades from the opposite side of the street so the sun doesn’t bleach the wall.
This is also the time to photograph people more naturally—many visitors arrive, but the streets haven’t peaked yet.
South-facing bastions: waves, flags, and “loud” ocean texture
When you move onto the sea-facing ramparts, you’re working with the southern ocean edge. This direction is excellent for:
- Wave-splash action (especially when the water is energetic)
- Flag-and-rigging silhouettes if you catch boats near the horizon
- Longer wall-to-sea lines that show distance
Tip for photography consistency: pick one wall segment and keep returning to it as light changes, rather than constantly switching locations.
West-facing angles: sunset silhouettes and long shadows
For sunset-style framing, head toward the west/southwest view as the day cools. West-facing ramparts can deliver:
- Long shadows along the wall (great for texture)
- Silhouette effects on the sea edge if clouds thin out
- A cleaner horizon if you position yourself so the sun stays just out of frame
If the crowd builds, keep moving along the wall until you find a gap—there’s usually more “breathing room” just a few minutes’ walk away.
Promenade and Seafront Walk: Waves, Boats, and Lighthouse Frames
Use the lighthouse end for wide coastal views
If you want an easy “photo payoff” after the fort streets, work toward the Galle Lighthouse area and the seafront edges nearby. This stretch is ideal for:
- Wide shots that include both the fort edge and open water
- Ocean texture (foam patterns and wind-driven waves)
- Foreground depth by including rocks, steps, or railings
Choose your angle: parallel to the sea beats straight-on glare
For many viewers, straight-on seafront shots turn into glare or flat water. Instead:
- Walk so you can photograph parallel to the coastline.
- Get low for foreground water movement.
- Keep the horizon slightly higher in the frame for a stronger sense of place.
Photograph fishermen and everyday coastal life without rushing
Coastal areas often get busier around calmer times of day. For candid street-to-sea storytelling:
- Stand to the side and let people pass through your frame naturally.
- Give priority to your background—avoid placing busy signage or clutter directly behind a subject.
- If you’re aiming for motion blur, slow shutter settings can work well near waves, but keep an eye on stability.
Promenade-style photo stops that consistently work:
- Galle Lighthouse (wide end-point images): Your anchor shot.
- Seawall stretch near the lighthouse (wave-splashes): Best for textured water.
- Harbor edge viewpoints south of the fort (boats + horizon): Great when boats are active.
- Rocky sea-edge angles along the ramparts (foreground depth): Useful for dramatic compositions.
- Sunset rampart angle (west-facing silhouettes): A classic, but most successful when you find a small gap.
- Fishermen hour by the harbor edge (documentary-style frames): Timing varies, but the “human + sea” combination is what to watch for.
Crowds and Heat Management: Keep the Day Photogenic
Expect the busiest pockets to be predictable
Crowds usually build in the most obvious “flow routes” through the fort: the main streets, the clock tower area, and the easiest access points to ramparts. The fix is simple:
- Start earlier than the mass foot traffic.
- Use wide shots and wait—don’t fight people at the exact same angle.
- When the route thickens, step sideways into a parallel lane, then re-emerge at the wall.
Time your walking for comfort
Heat often peaks when the sun is high and there’s little shade between walls. If you’re trying to photograph consistently, treat the day like two seasons:
- Warm-morning block: streets + churches + clock tower junction.
- Late-day block: ramparts, seawall, and lighthouse approaches.
Midday is better for short moves between shaded courtyards, church interiors (where photography is allowed), and slower browsing moments.
Use cloud cover strategically (especially for ocean shots)
If you get cloud cover, don’t automatically assume your day is ruined. Overcast conditions can:
- Reduce harsh contrast on building stone.
- Improve detail in dark doorways.
- Still give you dramatic wave textures, especially when wind pushes white water.
If the air turns humid and visibility fades, shift your focus from far-horizon lighthouse shots to close architectural textures.
What to Do Next for Your Galle Fort Photo Day
Decide on a start point (fort streets in the morning, ramparts/lighthouse closer to sunset) and build a simple 2–3 hour loop first, then extend if the light holds. Once you’re on the ground, shoot in short bursts, move when crowds stack up, and save your “final frames” for the west-facing sea edge.