

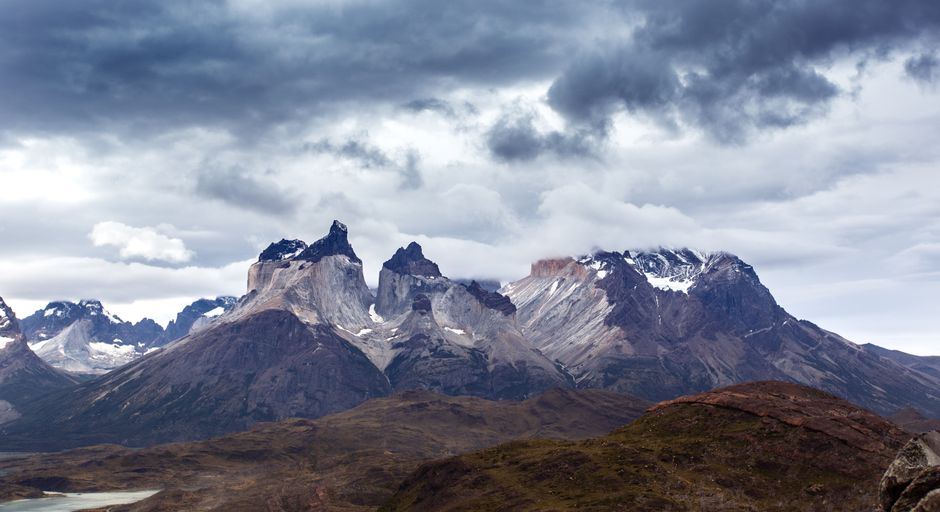
You will find the W trek in Torres del Paine is one of Patagonia’s most rewarding self-guided routes, but it does require planning. The trail is well marked, yet the “real work” is getting the timing right: reserve your nights, line up the park water crossings, and build enough buffer for wind and rain.
Below is an end-to-end, self-guided itinerary with realistic hiking windows, plus the booking and shuttle steps that usually trip people up.
Key W highlights to plan around
Use these as your anchors when you pace your days:
- Paine Grande
- Refugio Grey
- Campamento Italiano
- Refugio Francés
- Campamento Los Cuernos
- Refugio Torres
- Refugio Chileno
- Mirador Las Torres
- Valle Francés
- Grey Glacier viewpoints
What the W Trek Really Needs: 5 Days, Realistic Pace, Clear Priorities
The classic W is usually done in 5 days / 4 nights, with you sleeping at refugios or designated camps along the way. You will walk uphill and through exposed sections, and weather can turn a “manageable” hike into a slow grind.
Route direction and where you should expect your best views
Most travellers aim to finish at Mirador Las Torres (so you can decide earlier in the trip whether to push for the summit view). A practical approach is to start closer to the Grey/Frances side and work toward the Torres side.
If you are optimising for views, your best bet is:
- Do the Las Torres effort when you have the most flexible weather window.
- Keep the day before your Torres morning as “stable” as possible (not your longest crossing).
How long you walk each day (realistic timing windows)
Timings vary with your fitness, wind, and how long you pause for photos, but for planning purposes, expect:
- Day 1: about 5–8 hours of hiking, including breaks and arrivals to your first night
- Day 2: about 6–9 hours of hiking across valleys and ridge sections
- Day 3: about 6–9 hours with changing terrain and a bigger elevation profile than people expect
- Day 4: about 6–10 hours if you do the full loop to your night stop (this is where pacing matters)
- Day 5: about 3–6 hours from your last overnight to the exit area
If you want the trip to feel “self-guided” rather than rushed, plan around the lower end of those ranges and treat extra time in your schedule as your safety margin.
The sections that are usually hardest in practice
Even with good trail marking, these are the parts that slow most people down:
- Wind exposure in open stretches (you may still be walking, but your pace will collapse)
- Low visibility days (rain can make route-finding slower)
- Long valley days when you start early but forget to eat and drink steadily
Booking and Transport: Getting to the Start, Reserving Refuges, and Timing Transfers
Self-guided doesn’t mean “no logistics.” In Torres del Paine, you are arranging beds and access around the park’s movement system (shuttles and water crossings).
What you need to reserve ahead
Before you buy flights or lock your travel days, make sure you can secure the backbone of your nights:
- Refugio/camp reservations for each night along the W route
- Your preferred hiking direction (so your night stops make sense)
- Any in-park transport components you need to connect trailheads (especially water crossings)
In peak season, popular dates can sell out. If you are travelling in the Austral summer (roughly December to March), book as far ahead as practical.
Getting to the park: bus transfers from Puerto Natales or Punta Arenas
Most travellers reach Torres del Paine by road from one of these hubs:
- Puerto Natales: commonly ~3.5–5 hours depending on the exact drop-off and road conditions
- Punta Arenas: commonly ~5–7 hours
You will usually arrive at a designated access point for the route you are doing, then connect to in-park movement from there. Build in daylight for your travel day so you do not feel forced to start hiking in failing light.
Shuttle and water crossing logistics inside the park
The W route often depends on getting between specific starting points using:
- Park shuttles between access areas
- Water crossings (catamaran/ferry style) that move you to the right trailhead
Because departure times can vary by season and operational conditions, the realistic planning rule is:
- Lock your reservation nights first.
- Then confirm the exact departure options that match your itinerary days.
- Keep buffer time for weather delays; if your crossing is late, you may need to adjust your first day’s hike length.
Day-by-Day Self-Guided W Itinerary (Clockwise to End at Las Torres)
This plan is designed to keep your pace steady and your decision points early enough to matter. It assumes you are competent on uneven trails and you carry a rain layer and a warm mid-layer.
Day 1: Start toward Paine Grande and reach Refugio Grey
Hike window: about 5–8 hours
What you are trying to accomplish: get to Refugio Grey with enough energy left for a late-afternoon walk/river view (if conditions allow).
How to pace it:
- Start early enough that you are not hiking the worst wind exposure in the late afternoon.
- Eat on a schedule (Patagonia rewards steady fuel; waiting for “the big meal later” usually backfires).
Common slowdown triggers: rain bands that reduce visibility near shoreline sections, and gusty weather that makes you walk slower than you think.
Day 2: Refugio Grey via Campamento Italiano to Refugio Francés
Hike window: about 6–9 hours
What you are trying to accomplish: reach Valle Francés feeling like Day 3 is still possible at a comfortable pace.
Decision point to watch: if the day starts wet but the forecast suggests improving visibility later, you can keep your plan. If it stays stormy, consider trimming rest stops so you still arrive before you feel “boxed in” by darkness.
Day 3: Refugio Francés through Los Cuernos to your next night stop
Hike window: about 6–9 hours
What you are trying to accomplish: set up your final Torres push. Many travellers underestimate how mentally draining Day 3 can be because the terrain keeps changing.
Practical pacing tips:
- Keep breaks short and purposeful.
- Don’t chase every viewpoint if weather is actively worsening; you can still get a strong experience even without lingering at every platform.
Day 4–5: Las Torres Morning, Rain Decisions, and a Calm Finish
This is where flexibility pays off. Your goal is to reach the Las Torres morning when conditions are best, not simply when your calendar says so.
Day 4: Camp to Refugio Torres and set up for Mirador Las Torres
Hike window: about 6–10 hours
Depending on your exact night stop, your Day 4 usually includes:
- A longer travel-and-hike section that lands you near the Torres area
- Time to get oriented before your early start
Plan this day like a prep day, not a “maximum mileage” day. If the weather is already shifting toward heavy rain, you may prioritise reaching your overnight and sleeping well over squeezing in an extra viewpoint detour.
Day 5: Morning climb to Mirador Las Torres, then exit via Refugio Chileno
Hike window: about 3–6 hours
Most people do the Mirador Las Torres climb early to improve the odds of visibility. If you wake up to low cloud and heavy wind, you should not treat the hike as guaranteed.
Weather and rain decision points (so you don’t lose the trip)
Patagonia weather can change quickly. The key is to make decisions early enough that you can still preserve your core route.
Use these decision points:
- If visibility is poor at the Torres access point: focus on staying safe and consult the on-site guidance. If the route becomes a visibility gamble, it is reasonable to scale back rather than push blindly.
- If rain is forecast to persist all day: plan for a shorter version of the day where possible (often fewer viewpoints, faster movement between key points). Your priority becomes arriving at your next night stop with daylight.
- If you are delayed by weather: keep the next night reservation fixed, then adjust the hike effort to ensure you arrive on time. In practice, arriving late and camping in “uncertain conditions” is riskier than walking less.
- If wind is extreme in exposed zones: slow down and use the safest line through gusty areas. You do not need to prove toughness—your goal is to finish the trek.
Navigation and Comfort: Staying Independent on Marked Trails
The W is marked, but self-guided still means you manage your body, your pace, and your ability to improvise.
Navigation that actually works on windy days
Have a backup system:
- Download offline maps before you arrive in the park area
- Carry a paper backup (a simple printed track description or route sketch is often enough)
- Use your phone for orientation, but treat it as secondary in heavy rain
When trails are slick, navigation errors become slower to correct. That’s why it’s worth planning your day so you are not rushing.
Pace strategy that keeps you moving in the right temperature range
Wind and rain often bring big temperature swings. A simple pacing approach helps:
- Walk at a steady effort for the first 45–60 minutes, then settle into a rhythm
- Eat small amounts regularly (don’t wait for “when you reach camp”)
- Change layers early, not late—once you are soaked, drying takes too long
What to do if you fall behind (without panic)
If you are behind your expected timing window:
- Stop counting “minutes,” start counting “safe arrival time”
- Decide whether to cut non-essential viewpoints to protect your arrival
- If you feel exhausted or chilled, prioritise warmth and hydration over distance
This keeps you independent while still staying realistic.
Next Steps: Lock Your Dates and Rehearse Your Pace
Pick your travel month first, then match your plan to the availability of refugio/camps for the nights you need. Once your dates are set, confirm the in-park transport components that connect your trailheads, and then build a strict “arrive with daylight” buffer into every day’s schedule.